In this lab you will explore Prism Element and become familiar with its features and navigation. You will use Prism to perform basic cluster administration tasks, including storage and networking. You will also walk through basic VM deployment and management tasks with Prism and AHV. Finally, you will explore VM data protection, including snapshots and replication.
The Prism service provides the web UI for managing Nutanix clusters and runs on every Controller VM (CVM). This local Prism service, referred to Prism Element, can be accessed via the IP of any individual CVM, or via the virtual IP for the cluster, which will redirect to the current Prism leader.
Open https://<NUTANIX-CLUSTER-IP>:9440 in a new browser tab.
Log in using the following credentials:
Username - ask your Instructor
Password - ask your Instructor!
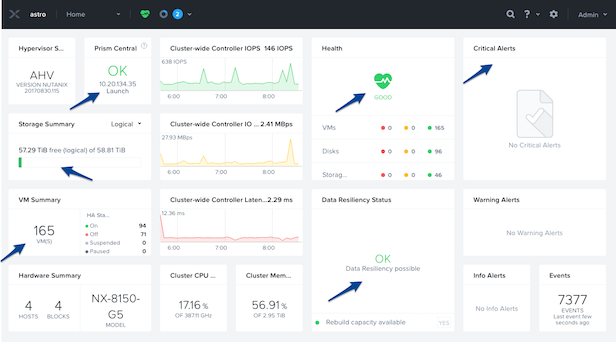
After you log in to Prism Element, familiarize yourself with the Prism UI. Explore the information on the Home screen, as well as the other screens.
Review the Home screen, and identify the following items:
Hypervisor
Version
Hardware Model
Health
VM Summary
Warning Alerts
Data Resiliency Status
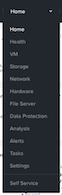
Review the UI navigation options under the View Options pull-down menu. The label of this menu changes based on the dashboard that is currently displayed. For example, from the Home dashboard it will be labeled Home, from the Health dashboard it will be labeled Health, etc.
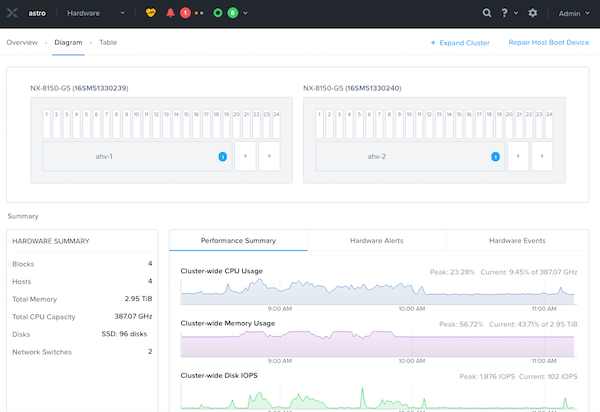
Examine the cluster hardware under Home > Hardware, click Hardware, then click Diagram.
Review the hardware summary information:
Blocks
Hosts
Memory
CPU
Disks
Review the other sections, and do a quick walk through:
VM
Health
Network
Data Protection
Storage
Alerts
Etc.
Review other sections of the Prism UI
Health
Alarms
Tasks
Search
Help
Configuration
User
Note
The screenshot above may differ slightly than what is seen in the lab environment.
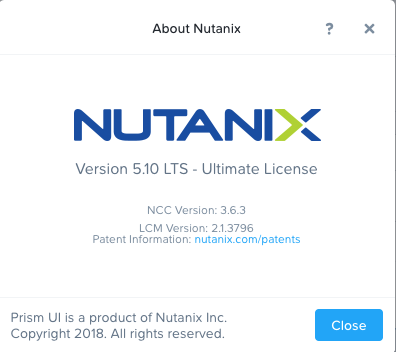
Where would you locate the version of AOS you are running?
You can do this by clicking on the username drop down on the far right, and clicking About Nutanix.
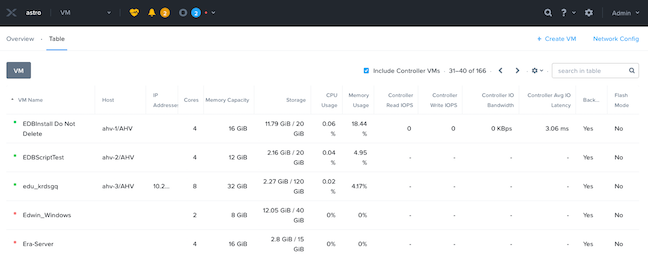
How would you get to the following screen to view a summary of the number of hosts (or nodes) and the resource capacity and current utilization?
From the View Options menu, select Hardware, then click Table.
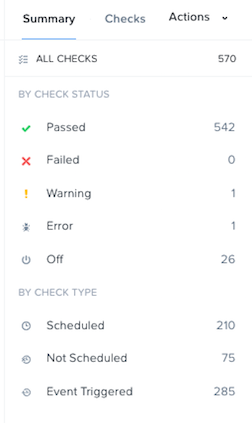
How would you get the following screen to see the health of your cluster?
From the View Options menu, select Health, then click Summary in the right pane.
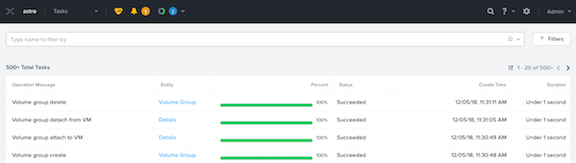
What page would show you the latest activity in the system? On this page, you can monitor the progress of any task and keep track of what has been done in the past using time stamps. Can you figure out two different ways to get there?
From the View Options menu, select Tasks, or click the circle icon in the toolbar, to the right of the bell icon .
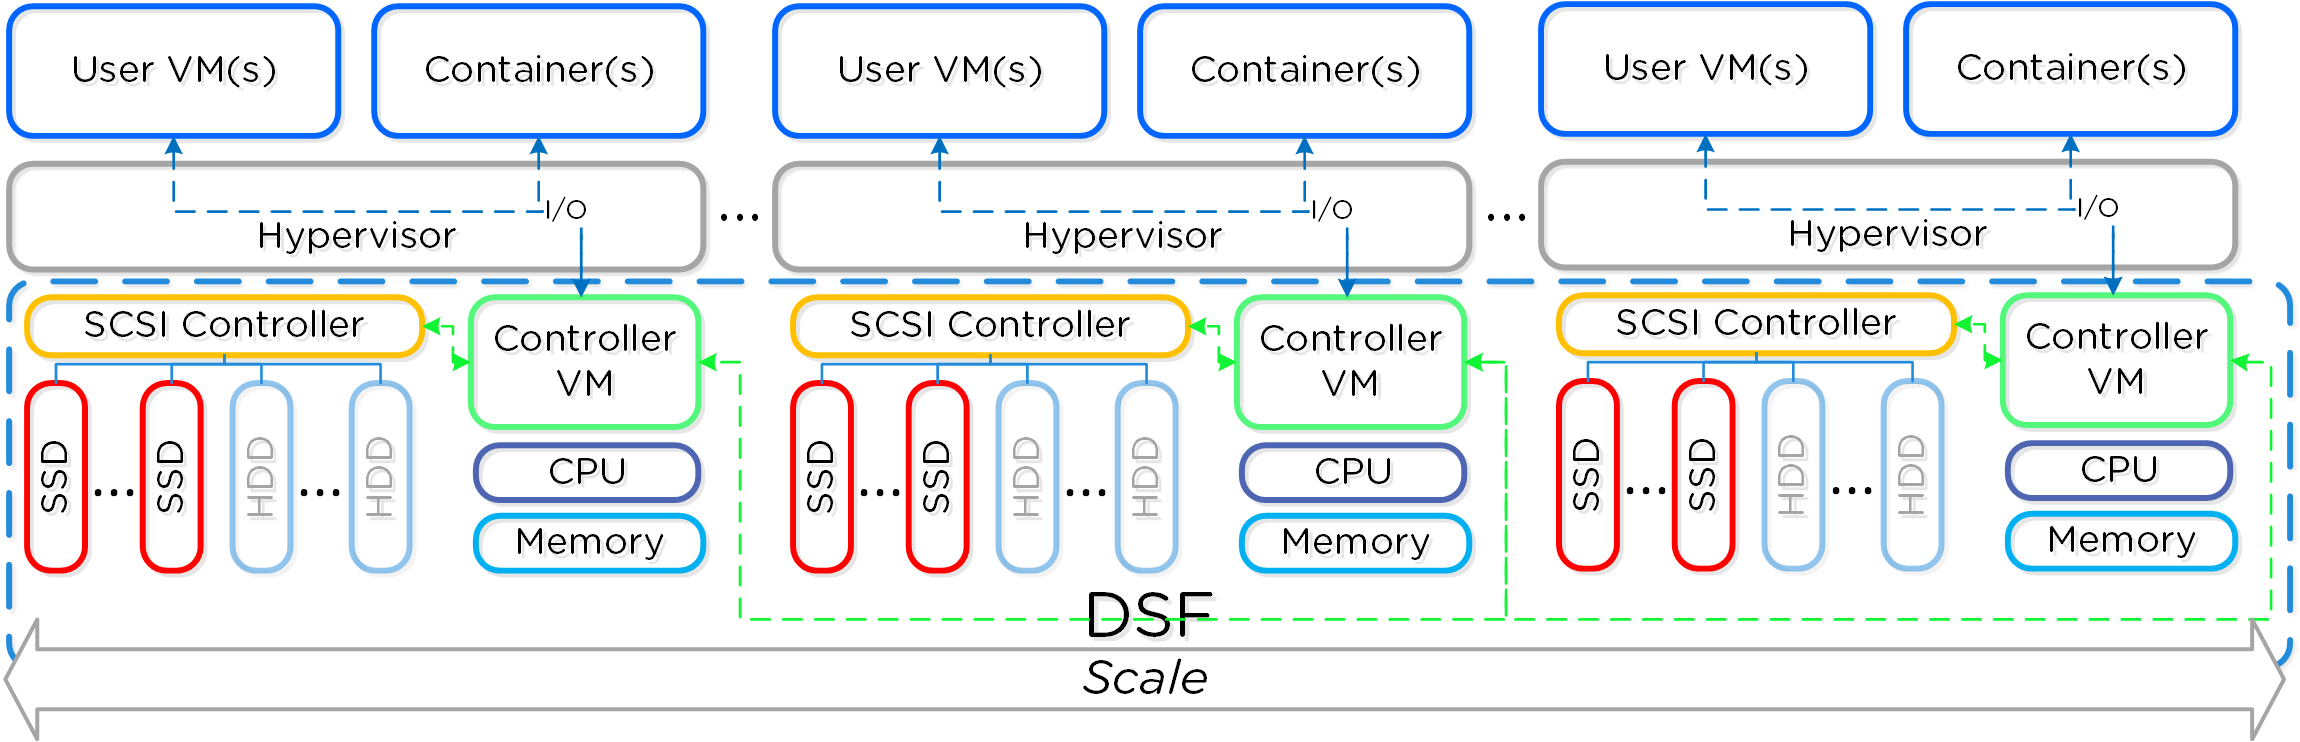
The Nutanix Distributed Storage Fabric (DSF) appears to the hypervisor like any centralized storage array, but uses the CVMs and local storage in each node to provide shared storage for the cluster - the combination of compute and distributed local storage is what is now commonly referred to as Hyperconverged Infrastructure (HCI).
As a pioneer in the HCI space, Nutanix DSF is a mature solution capable of delivering the performance and resiliency needed to support many different workloads, including enterprise databases, virtual desktops, ROBO, Big Data, and more.
The two main storage constructs within the DSF are the Storage Pool and Storage Containers.
The Storage Pool is the aggregation of all of the physical disks within a given Nutanix cluster. The cluster manages distribution of data, so configuration of additional storage pools (like LUNs in a traditional storage environment) is not required. As new nodes are added to a cluster, disks are automatically added to the pool and the cluster will begin re-distributing data to the new disks as a background task.
Storage Containers are software-defined, logical constructs that allow you to configure storage policy for groups of VMs or vDisks. In the next exercise, you will walk through the process for creating and configuring Nutanix storage within Prism.
Note
To learn more about additional DSF constructs such as vDisks, extents, and extent groups, refer to this section of the Nutanix Bible.
In Prism Element> Storage, click Table, then click + Storage Container.
Use the following specifications:
Name - Initials-container
Select Advanced Settings
Advertised Capacity - 500 GiB
Select Compression
Delay (In Minutes) - 0
Note
Leave other settings at their default values.
Click Save.
The storage container will now be available across all nodes within the cluster.
In AHV, the hypervisor creates a separate iSCSI connection to the DSF for each vDisk in use. In ESXi environments, each Storage Container is automatically mounted to the hypervisor as an NFS datastore. Similarly, in Hyper-V, each Storage Container is presented as an SMB datastore.
Note
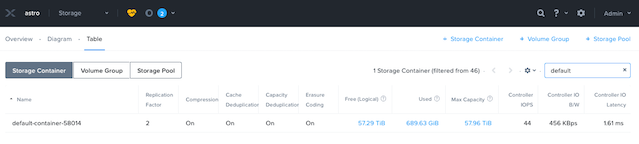
Example view of Storage Containers from Prism:
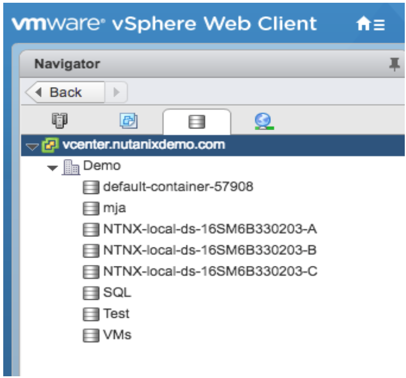
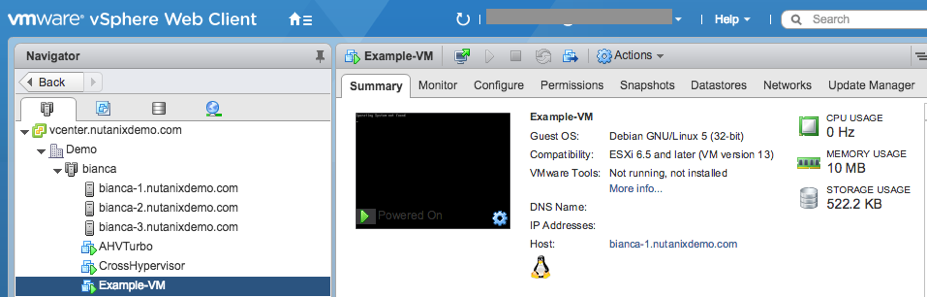
Example view of Storage Containers (datastores) from vCenter:
You can create multiple containers with different policies, all sharing capacity from the Storage Pool.
For instance, you may want to enable deduplication for a storage container used for full clone persistent virtual desktops, but deduplication wouldn’t make sense for workloads such as databases. Similarly, you may want to create a storage container with erasure coding enabled for archival data such as backups or security footage.
Explore the configuration basics further by updating your Container configuration. How would you ensure capacity availability for critical VMs on a cluster running mixed workloads?
Try selecting different storage containers on the cluster and reviewing the Storage Container Details below the table.
This view provides a breakdown of the savings from each available data reduction option as well as the Effective Usable Capacity of the container. Hover your mouse over any link for further details. The Data Reduction Ratio is the data efficiency when accounting for only compression, deduplication, and erasure coding. The Overall Efficiency number tracks data reduction as well as native data avoidance in DSF, specifically savings from thin provisioning and cloning.
Note
Interested in determining how much logical storage Nutanix can provide in different RF2 or RF3 configurations? Check out the Nutanix Storage Calculator.
The Distributed Storage Fabric uses a Replication Factor (RF) approach to data protection, rather than legacy RAID techniques. By default, writes to Nutanix storage create two copies of the data with the ability to sustain a single node failure - this is called RF2. For very large clusters, or critical workloads, Nutanix can write three copies of the data with the ability to sustain two node failures - this is called RF3.
Interested in learning about how RF writes and reads work? Check out the video below!
RF policies are applied on a per storage container basis within Prism Element.
Block Awareness, in a sufficiently large cluster, ensures that secondary copies of data are not written to a node within the same physical enclosure as the primary copy. This allows for the loss of a multi-node block without experiencing data unavailability. The same concept can be applied using a Nutanix cluster spanning multiple racks.
The basic requirement for rack/block fault tolerance is to have minimum 3 blocks in the cluster (for RF2) as we need to store 3 copies of metadata. Starting in AOS 5.9, rack and block awareness can be supported with erasure coding enabled.
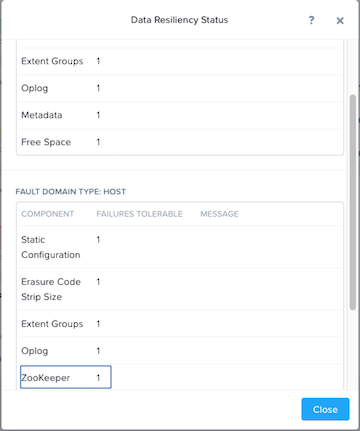
From the View Options menu, click Home, and click OK in the Data Resiliency Status box.
Data Resiliency Status indicates how many failures can be tolerated without impacting the cluster. Each service listed has a specific function in the cluster. For example, Zookeeper nodes maintain configuration data (service states, IPs, host information, etc.) for the cluster.
The RF of a cluster in Prism Element can be configured by clicking Redundancy State in the menu.
Note
For this exercise, please leave the redundancy factor configured as 2.
An RF2 cluster can be upgraded in place to support RF3 (with a minimum of 5 nodes). If a cluster is configured for RF3, 5 copies of metadata will be created for all data, regardless of whether or not the individual storage containers are configured as RF2 or RF3.
AHV leverages Open vSwitch (OVS) for all VM networking. OVS is an open source software switch implemented in the Linux kernel and designed to work in a multiserver virtualization environment. Each AHV server maintains an OVS instance, and all OVS instances combine to form a single logical switch.
Each node is typically uplinked to a physical switch port trunked/tagged to multiple VLANs, which will be exposed as virtual networks.
VM networking is configured through Prism (or optionally CLI/REST), making network management in AHV very simple. In the following exercise you will walk through virtual network creation in AHV. In Deploying Workloads you will create virtual NICs which will be assigned to your virtual network.
Note
In the following exercise you will create networks using invalid VLANs, meaning no VM traffic will be transmitted outside of an individual host. This is expected as the exercise is for demonstration/education purposes only.
Additional details about AHV networking can be found here.
Connect to Prism Element and create a network for user VM interfaces. Use any VLAN other than 0, and do not enable IP address management.
From the View Options menu, select VM, and click Network Config on the right hand side.
Select Virtual Networks, then click + Create Network.
Fill out the following fields and click Save:
Name - Initials-Network
VLAN ID - A value (< 4096) other than your Primary or Secondary network VLANs
Do not select Enable IP Address Management
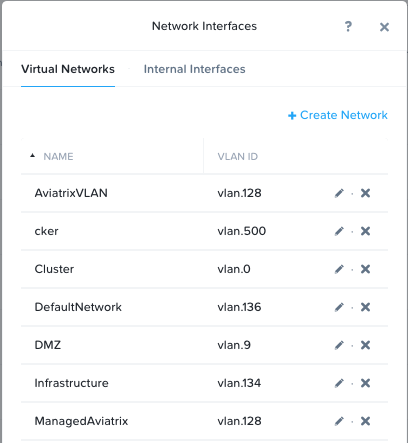
The final result should look like the image below.
The configured virtual network will now be available across all nodes within the cluster. Virtual networks in AHV behave like Distributed Virtual Switches in ESXi, meaning you do not need to configure the same settings on each individual host within the cluster. When creating VMs in IPAM managed networks, the IP can optionally be manually specified during vNIC creation.
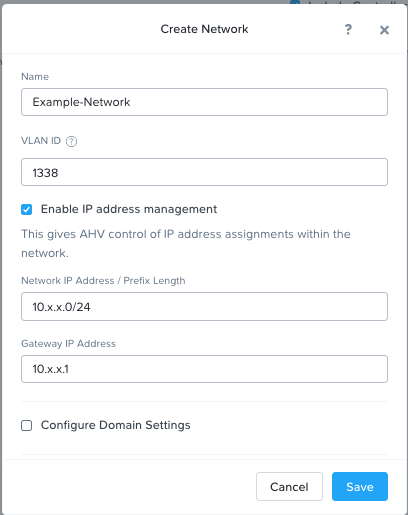
Create another network, but this time enable IPAM.
Fill out the following fields and click Save:
Name - Initials-Network_IPAM
VLAN ID - A value (< 4096) other than your Primary or Secondary network VLANs
Select Enable IP Address Management
Network IP Address / Prefix Length - 10.0.0.0/24
Gateway - 10.0.0.1
Do not select Configure Domain Settings
Create Pool - 10.0.0.100-10.0.0.150
Do not select Override DHCP Server
Note
It is possible to create multiple pool ranges for a network.
The configured virtual network will now be available across all nodes within the cluster. VMs with vNICs on this network will receive a DHCP address from the range specified. This IP assignment lasts for the life of the VM, avoiding the need to depend on DHCP reservations or static IPs for many workloads.
In this exercise you will create a Windows Server VM from a Windows installation ISO image.
AHV provides an Image Service feature allows you to build a store of imported files that you can use to create a CD-ROM from an ISO image or an operating system Disk from a disk image when creating a VM. The Image Service supports raw, vhd, vhdx, vmdk, vdi, iso, and qcow2 disk formats.
Note
You can explore the available images and upload additional images under > Image Configuration in Prism Element.
In order to provide high performance IO to VMs, AHV requires the installation of paravirtualized drivers into the guest (similar to VMware Tools). For Windows guests specifically, these drivers must be loaded during installation in order for the VM’s disk to be accessible by the Windows installer.
Nutanix validates and distributes these drivers via http://portal.nutanix.com. The ISO image containing the drivers has already been uploaded to the Image Service.
From the View Options menu, select VM and click + Create VM.
Fill out the following fields and click Save. Leave other settings at their default values.
Name - Initials-Windows_VM
Description - (Optional) Description for your VM.
vCPU(s) - 2
Number of Cores per vCPU - 1
Memory - 4 GiB
Select next to CDROM
Operation - Clone from Image Service
Image - Windows2012R2.ISO
Select Update
This will mount the Windows Server ISO from the Image Service for boot/installation
Select + Add New Disk
Type - DISK
Operation - Allocate on Storage Container
Storage Container - Default
Size (GiB) - 30 GiB
Select Add
This will create a 30GiB vDisk on the selected Storage Container
Select + Add New Disk
Type - CDROM
Operation - Clone from Image Service
Image - Nutanix VirtIO ISO
Select Add
Select Add New NIC
VLAN Name - Primary
Select Add
This will add a single virtual NIC to the VM on the selected Virtual Network
Click Save to create the VM.
Click Table to change the view.
Select the VM, then click Power On from the list of action links (below the table) to turn on the VM.
Select the VM, then click Launch Console from the list of action links to access an HTML5 console to interact with the VM.
Progress through the standard install questions until you reach the Windows install location.
Note
Choose Windows Server 2012 R2 Datacenter (Server with a GUI) and Custom installation when presented with the choice.
Accept the EULA.
Select a Custom installation.
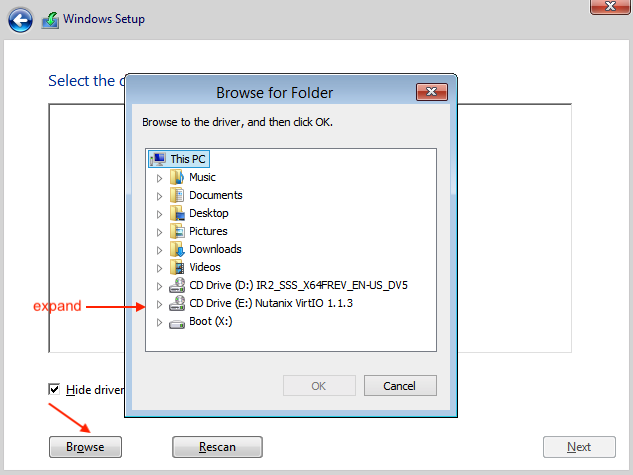
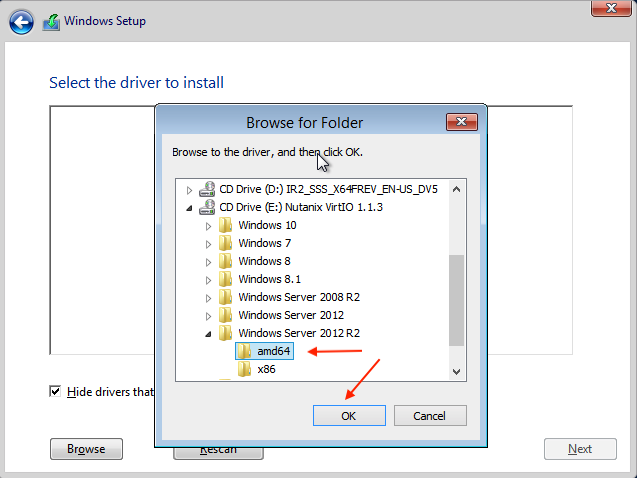
Click Load Driver and navigate to the CD where the Nutanix VirtIO is mounted.
Browse the CD, and select the directory that corresponds to the Windows OS being installed.
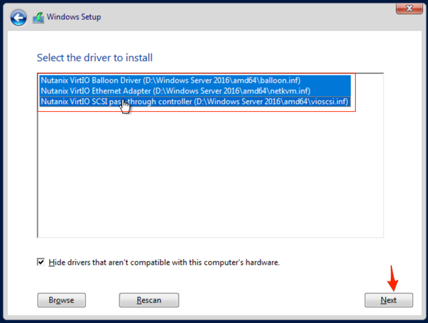
Select the three Nutanix drivers displayed (Press and hold the Ctrl key and select all three drivers):
Balloon
Ethernet adapter
SCSI passthrough controller
Click Next.
After the drivers are loaded, the disk created in Step 2 appears as an installation target.
Select that disk and continue with the normal install process.
After the installation completes, if desired, the Windows install and the VirtIO ISOs can be unmounted from within Windows, and the CD-ROMs can be removed from the VM by selecting the VM in the table, clicking Update from the list of action links, and removing the CD-ROM disks (VM must be powered off).
Note
For ESXi clusters, if a VM is created via VMware vSphere, it appears in the Prism VMs list. Alternatively, if a VM is created via Prism, it appears in the VMware vSphere UI. No manual syncing or waiting is required.
During the Windows setup use nutanix/4u as the local administrator password.
Log in to the Windows VM, close Server Manager and shutdown the VM.
Once powered-off edit the Windows VM properties (click the pencil icon) and eject the CD-ROM drives of their media and click Save.
Following OS installation you can complete the Nutanix Guest Tools (NGT) installation by selecting the VM in Prism and clicking Manage Guest Tools > Enable Nutanix Guest Tools > Mount Guest Tools, and clicking Submit.
This will use the virtual CD-ROM device to mount the NGT installation ISO to the VM. NGT includes the previously installed VirtIO drivers, as well as services to support self-service file restore and application consistent (VSS) snapshots.
Power on the Windows VM, Launch Console and log in to Windows.
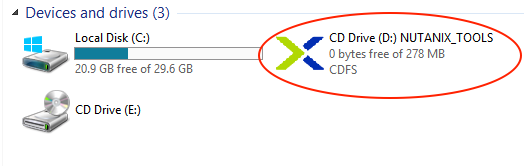
Return to the VM console to complete the NGT installation by clicking on the Nutanix Guest Tools CD.
Using Windows Explorer locate the CD-ROM drive and double-click setup.exe.
In this exercise you will create a CentOS VM from an existing, pre-installed disk image in the Image Service. It is common in many environments to have “template” style images of pre-installed operating systems. Similar to the previous exercise, the disk image has already been uploaded to the Image Service.
From the View Options menu, select VM and select Table, then click + Create VM.
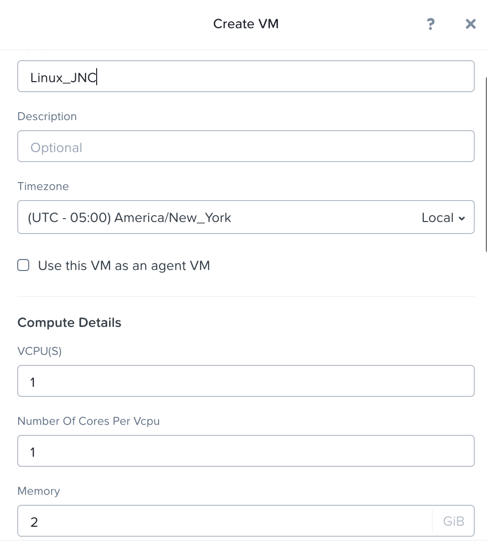
Fill out the following fields and click Save. Leave other settings at their default values.
Name - Initials-Linux_VM
Description - (Optional) Description for your VM.
vCPU(s) - 1
Number of Cores per vCPU - 1
Memory - 2 GiB
Select + Add New Disk
Type - DISK
Operation - Clone from Image Service
Image - CentOS7.qcow2
Select Add
This will create a thin clone of the existing CentOS disk image
From the View Options menu, select VM, and click Table. Use the search bar to locate the Linux VM you created in the previous exercise (Initials-Linux_VM).
Note that the Power State column for that VM shows a red dot, indicating that the VM is powered off.
Select the VM, then click Power On.
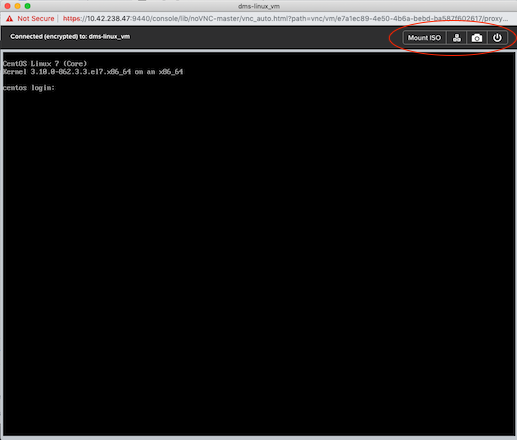
Select the VM, then click Launch Console.
The console window provides 4 actions: Mount ISO, CTRL-ALT-DEL, Take Screen Capture, and Power.
Note
In ESX:
The steps in this exercise could also be done from Prism while using an ESXi cluster that has its VMware vCenter instance registered to Prism.
Unlike ESXi, high availability is enabled by default for AHV and will restart VMs in a best-effort manner in the event of a host failure. Additional configuration can set resource reservations to ensure there is capacity during an HA event.
Note
To enable memory reservation, in a cluster of at least 2 nodes, select Enable HA Reservation under > Manage VM High Availability.
As memory is already limited on the shared cluster resources, please do NOT enable HA memory reservations.
With the Acropolis Dynamic Scheduler service, AHV performs intelligent initial placement of VMs and can dynamically migrate VMs to other hosts within the cluster to optimize workload performance. This is done “out of the box” without additional configuration.
A benefit of a Nutanix AHV solution is being able to make VM placement decisions not based solely on CPU/memory congestion avoidance, but also based on storage performance.
See here for additional details about the Acropolis Dynamic Scheduler.
VM live migration is a critical feature for any virtualized environment, allowing VMs to move seamlessly across hosts within a cluster to enable infrastructure maintenance or performance balancing. In a cluster of at least 2 nodes, you would be able to select the VM from the table and click Migrate from the list of action links.
VM-to-Host affinity rules are commonly used to map VMs to certain hosts for performance or licensing reasons. AHV can also create VM-to-VM anti-affinity rules, commonly used for highly available applications where you need to ensure multiple instances of an application do not run on the same node. In a cluster of at least 2 nodes, there would be a + Set Affinity option within the VM options.
Nutanix provides the ability to perform VM/vDisk-level storage snapshots. Protection Domains (PDs) are the construct for grouping VMs and applying snapshot and replication policies.
In this exercise you will use Prism to create and restore from VM snapshots, as well as create a Protection Domain for your VMs.
From the View Options menu, select VM and select Table, and select your Initials-Linux_VM VM.
If the VM is powered on, perform a Guest Shutdown power action.
Select the VM and click Take Snapshot from the menu below the table.
Provide a name for your snapshot and click Submit.
Select the VM Snapshots tab below the table to view the available snapshots for the selected VM.
Under Actions, click Details to see all of the VM’s properties at the time of the snapshot.
You can see the snapshot contains VM state in addition to just its data.
Now it’s time to break your VM!
Click Update to modify your VM and remove both the CD-ROM and DISK by clicking the X icon for each item.
Click Save.
Attempt to power on the VM and launch its console window.
Note that the VM no longer has any disks from which to boot and that the 2048 game is displayed.
Power off the VM.
Under VM Snapshots, select your snapshot and click Restore to revert the VM to a functioning state.
Alternatively you can click Clone to restore to a new VM.
Verify that the VM boots successfully.
As previously mentioned, Nutanix snapshots use a redirect-on-write approach that does not suffer from the performance degradation of chained snapshots found in other hypervisors.
From the View Options menu, select Data Protection and select Table, click + Protection Domain > Async DR to begin creating a PD.
Note
Synchronous replication (Metro Availability) is currently support on ESXi and will be supported in AHV in a future release.
Provide a name for the PD, and click Create.
Filter or scroll to select the VMs created during this lab that you want to add to the PD.
Click Protect Selected Entities and verify the VMs appear under Protected Entities.
Consistency groups allow you to group multiple VMs to be snapshot at the same time, e.g. multiple VMs belonging to the same application.
Note
Nutanix snapshots can perform application consistent snapshots for supported operating systems with NGT installed. Each VM using application consistent snapshots will be part of its own consistency group.
Click Next.
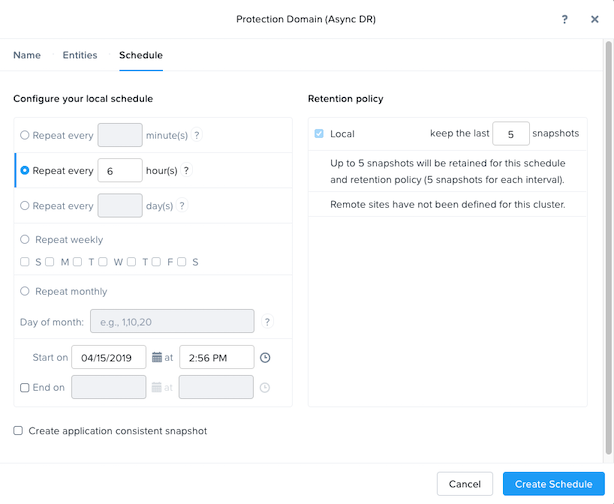
Click New Schedule to define Recovery Point Objective (RPO) and retention.
Configure your desired snapshot frequency (e.g. Repeat every 6 hours)
Note
AHV supports NearSync snapshots, with RPOs as low as 1 minute.
Note
Multiple schedules can be applied to the same PD, allowing you to take and retain X number of hourly, daily, monthly snapshots.
Configure a retention policy (e.g. Keep the last 5 snapshots)
Note
For environments with remote cluster(s) configured, setting up replication is as easy as defining how many snapshots to keep at each remote site.
Click Create Schedule.
Click Close to exit.
That’s it! You’ve successfully configured native data protection in Prism.